Sunday, February 27, 2011

Tutorial - Railroad Base

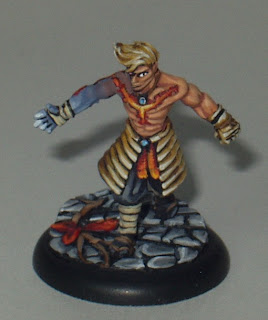
Hey all, another week and another update. To start things off i thought i would post a couple of picture of the finished base i did last week. It is all painted up and even has a figure to go with it! This is Derek from Anima Tactics.

This week i will be taking you through a tutorial that requires much less skill and a little more precision. The tutorial this week is for a railroad base as seen below on the wonderful Malifaux model Perdita.
What you need for this project is as follows: Baswood (or balsa), superglue (like you don't have this if your a gamer), your trusty nickle, a small ruler (not pictured), a 35mm base, an exacto, and flock ( preferably a mix of regular flock and sand flock). You will also need a very small amount of green stuff but it is not necessary.
So the first thing we need to do is fill in the slotta in this slotta base. Since i have started doing some cool custom bases the slotta has become a natural enemy. It is unneeded when you need to place the figure on top of a created surface. So to do this we will cut 2 small strips of bass wood that are about 6/8ths of an inch long and then glue them together. This will fit nicely inside the slotta. make sure you smooth out the surfaces of your filler peice. Glue it into the slotta making sure the surface is smooth.

Now that we have delt with the evil slotta we can get to the base itself. For this base it is best not to put plasticard over the surface of the base. You want your base creation to exist underneath the lip of the base. This will give it a better realism.

The first thing we will do is create the main rail you do this just like you created the slotta base filler piece. you will pick an angle on the base and measure it out using the nickle (the slotta is inconvenient to measure on because of the lip) cut out two strips that are your desired lengh and a little less than 1/8th of an inch thick.

Glue them together and you have your main rail. Glue the rail to the desired section of your base.


 Now we will start to work on the rail cross beams. For this cut out about 5 strips that as long as the diameter of your base. You probably won't need as many as this but its nice to have enough. These should be a little thinner than your main rail.

Now we want to add them to the base. To do this place one piece flush to your main rail on the side where you want the center of your rail to be. Then mark the place where it meets the lip of the base. I use a nail clipper to cut this since it usually matches the curvature of the base pretty well. Repeat this step until you have the amount of rails you want. Some of these pieces will have to cut at an angle instead of strait on.
Next we make the small outcropping of the cross rails as seen above. Just cut a small piece from your scraps of cross rails, they should be about 1/8th of an inch long or so and be as thick as the rail they are to compliment. Glue them in place so they look like continuations of your cross rails. These are a little tough to manipulate. I usually stick them on a pin and use the pin to manipulate them into place.


There, now we have our basic railway. you can stop now if you really want, but in my opinion it needs too look a little more rugged and natural. So now we add some flock. To do this grab a brush you don't need and smear a good amount of Elmer's Glue next to the rails. 

The green spots pictured above are just smooshed green stuff balls that are there to simulate rail spikes. These are not necessary but do add something to the piece. However, they are a little tricky to get into place. To get them where i want them I put glue on the crossbeam continuations and manipulate the green stuff with a pin. If you create them make sure you don't make them too big.

Next we pour flock over the glue. Blow off the excess and clean up the rails. There will be flock on the rails so take a sculpting tool and just clean things up and push some of the flock down below the rails. You will know what looks right when you do ( ya that's helpful right?)

Now we prime and presto! railway base all ready for painting.Sorry the final product is hard to see. i didn't have time to paint it up. I didn't even have time to paint a figure for it. Geeze I'm lazy.


Next week:
I will be taking a week off next week though i may update during the week. I plan on getting some games of Anima tactics in the week after and then i have Pax East! Woot, it should be fun. So unless i get some suggestions for tutorials of reviews the next three weeks will be week off, Pax stuff, Anima. That's a whole other month! Wow time floats on its little wings right by me.

Bonus stuff!!
Being relatively un-gifted at the sciences and currently taking lots of science courses, I constantly find new ways to try to distract myself ( subconsciously of course). I found this supremely awesome role playing game for the I phone/pad and have been playing it way too much. I mean when my party includes the Black Knight, and a Pirate!? Yes, very yes.

So go check out Battleheart. It is well worth the three dollars i spent on it.

Till next time,  game with your soul and not with the power.
peace,
Steve (AntiZombie)
Sunday, February 20, 2011

Tutorial - Stone step base

Hey all, this weeks update is brought to you by "Jackie Chan Adventures". Well not really, that's just what I'm watching while i update. Anyway I thought that it was high time I did a tutorial on something, anything really. One of the most important level ups in my painting skin was the realization that basing is in fact important - very important. I slowly learned that makeing my own bases was a good way to impress people. I am a pretty good painter but those well painted miniatures don't usually stick with a viewer unless there is a well executed base to go along with the miniature. In fact basing can take an otherwise flat or minimally highlighted figure and make it shine. So today I am going to post a how to with regards to making a base like this one which i used on my Malifaux Victoria.

So this is what you will need for this base. 1 30mm base, green stuff, a tool of some sort ( dental tools work the best ), super glue, flat smooth plasticard, scissors, exacto knife and a nickle (that's right a nickle).

Once you get all your materials together you can start (duh). So first what you will want to do is trace the nickle 6 - 8 times on your plasticard. Funny thing about nickles is that they are the exact size of the inside of a 30mm base (it's 30 right not 35? the small one). Once you do this cut out the circles. You probably don't need this many but depending on how tall you want your steps you might.

Once you get the circles cut out glue one to the inside of the base. This will cover up the slotta and give you a nice smooth surface that is flush with your base edge. Next cut all of the other circles in half. Take one of the half circles and glue it to the base so it is flush with the rounded edge (glue two together if you want a thicker step). This is your first step. After this take your other half circles and cut it so that there is an acute angle. Glue the larger piece so it is flush with the rounde base and on top of your first step ( glue two together for the thicker stairs). Finally do this one more time to make the top most step. 

Your base should be looking like the one in the picture above. The two non glued pieces i have in the picture are to show you the proper angles to cut and how they are in proportion to the circle.

So now we have our internal base skeleton. Its pretty cool, let's ruin it.

This is the part that takes a little bit of skill because it involves working with green stuff. Here are a few hard fought tips i have learned when working with green stuff.

- Lick your tool to smooth out green stuff.
-Push and pull the green stuff, do not try to force it into any particular shape.
-Water/spit smooths out green stuff
-Don't make too much green stuff, you can always add more but sometimes it is too hard to take stuff away.
So we will be making our steps from the top down. This makes it easier to preserve the shape. So first mix up a little bit of green stuff that is roughly the size of the first step. Get it wet and mash it up so its a nice green color. Then smoosh it to roughly to the shape of the top step. 

Next smooth it out with your tool.


Now that we have the stuff smoothed out we can begin to sculpt the stone step. Basically to sculpt the stones you just press the sharp edge of the tool into the green stuff to make the marks. Do not drag your tool to create the stones, simply push and pull the green stuff. Make circles starting with one pointed corner and working your way out. When you are done smooth out the edge leading down to the next step and make sure its nice and beefy.
Volia, you have your first step. Now repeat the process for the other two steps.

Two steps done now. Pay special attention to the edges facing the next steps and make sure they are nice and squared off. Below is a picture of how i do it with my dental tool.

Now finally we can add the very final layer of stone to the bottom. When you do this, after you are done smoothing it out, trim it so that it is flush with the base lip while leaving a small gap to deliniate the base and the base lip. Then carve the the final level of stones and you should get this:

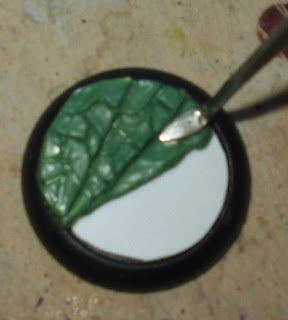
So now you have an awsome stone base. You can go back in and spruce things up, makeing sure that the steps are at right angles to each other and such. Remember, spit and water to smooth green stuff out. You can also press the stones down with your tool to minimize the gaps between the stones if you want too. So you can leave it at this or you can add some vines to make it look old and ruinish. Here is how you do it.

First roll out some small "vines" by simply rolling the green stuff. You should get some things that look like this:

Now arrange them artistically and so that they all have a common origin point. Here is an example:


Do as many as you want to. You can really get some neat effects by make the shape of the vines conform to the shape of the steps like in the finished example i gave you at the beginning.

Next pinch out some oval shapes for the leaves. Keep them in odd numbers - usually 3 or 5 leaves - to keep it natural looking. Then place them over the origin of the vines like so:


Now do a few touch ups and you have yourself a nice stone base. In the finally produce i cleaned up the edges and added a few ridges to the leaves to give them some depth.


And that is it folks. Prime and paint. Good colors to use on this are a dark grey to a light grey with a subtle harsh white highlight. Brown for the vines and dark angel's green for the leaves.


I hope people found this helpful. I suspect that I will do another base tutorial next week. If anyone has requests let me know. I haven't finalized the plan for next week. Hopefully  I will have time for a good update.  

In the future I plan on doing an Anima Tactics review and possibly an Infinity review. I have all the models i need for an Anima review I just want to get em painted up so there are some pretty pictures in the blog. I will also be at Pax east (as I have said). I hope some of you will come see me!

Till next time,
Steve (MDX)

Sunday, February 13, 2011

Review - Ron & Bones

Picture it: the middle of the Carribean. A boat floats listlessly through the warm blue waters. On board the small tattered craft lay four pirates, who were, frankly, still drunk. The one named El Antillano woke first. He stupled to his feet and looked around. Three others from his crew were still passed out on deck. The Captain was no where in sight. He smiled, pulled out his pistol and fired into the air. 

"Looks like the captain is dead. I'm the captain now!" 
The other three bolted up and jumped to their feet. Like El Antillano, they swayed a little more than what is it expected on a boat. Mellienete was the first to react.

"Like hell you are, I'm the captain!"
Another, whose name was Toruk-Te, had not really grasped the situation. He wore a shark on his back for stealth and was a native from a far off Island. He looked at the man claiming to be captain and figured, since all the other captains he served wore large silly hats, that this man - who also wore a large silly hat - must indeed be the new captain. The old one was no where in sight. 

At the same time Erika Crabby, a cabin-girl, was not about to see that old, ugly, misogynistic sea slug El Antillano be her captain. She reacted by pointing at Mellienete and shouting, "She's the captain!" 

El Antillano grinned a yellow-toothed smile, "So that's how it'll be eh girl? What say you Toruk?" 
Toruk only shrugged and moved closer to the man he thought was captain. 

"Guess well have a go at it then eh girls?" Antillano leveled his pistol and fired.... 
---

Meanwhile at a bar far back in port the REAL captain smiled as he downed another pint. Those four barnacles were finally gone. Sent adrift in a drunken haze. He had been trying to get rid of them for months but their insidous pirate nature just kept them around. "Finally I've some piece of mind," thought the captain.  

Welcome back! It's been a pretty crazy week for me but I do not fail in bringing you a review of Ron & Bones (finally). So the saga of this game and me started back in November. I received this game as a gift along with a few extra figures. It had been sitting in my drawer since about three weeks ago. I had gone through a roller coaster of emotions with regards to this game. First I saw the pirates and I was elated. Then I remembered I don't have money or time. Then I got it for my birthday. Then I opened the packaged and realized...the characters don't actually come with the cards. So in the end I shelved the game. However, after I started this blog I thought to myself, I wonder if there are online resources. Guess what? There were! The forums for Ron & Bones had everything I needed! The rest you have seen in a previous post and is what follows. 

The starter set is (as usual) a good place to start for the game. The Ron & Bones starter kit comes with a basic hex based board, the rule book (which I will discuss later), 2 miniatures that are not otherwise available, 2d10 and all the cards you need for those two pirates. My friend and I used this set and two other figures to play a few games. Now the game seems designed for a pirate crew of about 5-8 models, we used 2 figures each but managed to find a good scenario for the low point cost. 
                                              We are all set up to rumble on the open seas!
The rules:
Usually I don't get too into this but I feel it necessary in this case. You can download a copy of the rules here. The game is scenario based and uses a hex based board system. Facing is important. You have the 5 squares in front as your "Zone of Action" and the back as your Rear. Line of sight is drawn from ZoA (ZAC as they call it). 

Basically When I read the rules for this game I thought, this is way to complicated for a hex based game. I thought I was not going to enjoy this at all. Thankfully, I was wrong. Movement and attack are governed by "Combat scrolls". At the beginning of the turn you choose one scroll (each character has a set of them) and then reveal once everyone has chosen one. Then your characters get to act based on the initiative and actions on the combat scrolls. You can wrestle, stab, defend, insult, handle, jump or even fall and trip. Movement is based on these scrolls too. 

                            Melienete jumps overboard with a treasure chest she shanghai'd! 

Combat is a little more complicated but simply involves rolling a 2d10 against a determined difficulty level. The level is determined via  a chart and character position. Damage is then decided based on how much you exceeded the roll by. If you exceed it by enough your opponent may gain permanent damage. For example, in one game El Antillano put out Melienete's left eye and then finished her by decapitation. 

                                          While Ericka pelted Teruk from the deck with Ninja
                                    crabs, Mellienete fell to El Antillano! Guess he's the captain...

The scenarios found in the starter book rely on routing your opponent by 60% reputation (that is a stat of your characters). The scenario we played was called "I'm the Captain" and it was great fun. Basically the captain was rumored dead and everyone else wants to be captain. This got us around the rule that each crew needs to have a captain level character (they usually run about 100 gold to hire). We also had to roll on a drunkenness table. All the characters were pretty drunk!

The game also relies on objects like barrels tables and treasure chests (all available in the Tales of War Shop) for terrain. With these, however, you can pick them up and use them as weapons. Each character also has a back pack and two open hands. You put little counters in the characters' hands to symbolize the weapons they are carrying. If you're using a character's left hand and he is right-handed, you get a penalty to hit. Also, a character can be disarmed- they have to drop their weapon. This would give another character the opportunity to pick up that weapon.

All in all, despite my apprehensions about the rules, my opponent and I were pleasantly suprised by how fun this was. 

The Rundown and my opinion: 
So by the end of our gaming sessions both my opponent and I were resolute in our desire to purchase more of these figures. We had great fun being pirates and yelling "No! I'm the captain!" during our game, to the extent that people repeatedly asked us what we were playing. 

So now the unfortunate aspects of this game:
The most annoying this for me is that the characters, when purchased individually, do not come with their necessary cards. While you can download them for free it definitely takes away from the game that you have to buy card lots to have the cards in hand (the cards are actually very high quality). The rulebook also suffers from the pitfalls of translation. Sometimes, in fact, we found it difficult to decipher the rules because of it. All in all, we managed admirably, though. 

The game also suffers from something many gaming rule books suffer from- no index. This is a game where you have to reference charts and rules a lot when you first start the game. It is not always easy to find things in the book but by the end of our session we knew where most of the necessary info was and mostly just had to consult a couple of the charts. The rules are, sadly, not organized in a very intuitive way for you to find things quickly (I still have trouble finding the rule for "stuck" even though we looked it up 3 times). 
                                                 Toruk-Te and Erika defend their treasure.

All in all though, this was a very fun game. The creators have truly engineered a unique skirmish game. This is a definite must if your looking for a different experience in a skirmish game. It takes a a lot for the guy I play with to actively go out and spend money on a new miniature game. It was also nice to see what they are creating across the pond. So many miniature games come from America that it was cool to get out of cultural bubble of gaming. 

Rating: 
I give Ron & Bones three ratings.
Miniatures/creativity of play: 8/10
Accessibility/Ease of entrance into the game: 6/10
Overall experience: 7/10

I am not sure what I will be doing next week, but I suspect it will be a tutorial on how to make a stone step green stuff base. I also have Anima tactics minis on my painting table so that will mean a review of that of of course (these things are seriously cool). 

Also don't forget to get your Pax East tickets. I will be there all three days doing Malifaux demoing, Super Dungeon Exploring demoing, and general cavorting with the nice folks at the Warstore, Cool Mini or Not and Soda Pop Miniatures. Come have fun with me! 

Peace out all you cool cats in miniature land, Antizombie signing off. 

-Steve (MDX)


Wednesday, February 2, 2011

Showcase - Ron and Bones

Hey all,

So i got a snow day today and didn't have work. Early update! No game review yet (that will probably be next week with regards to "Ron and Bones") but i can say with confidence that i painted up some pretty cool miniatures for the game. Thought I would show them off since my classes got pushed back a week.

First of all the four miniatures i will be showing are all from the Tales of War Miniatures.
These guys make some pretty cool minis. They are certainly not limited to their Ron and Bones Pirate line. They have good selection of many different genres. Just keep in mind that some of the really cool looking minis are 54mm scale and not suitable for most table top games (unless you still play "Inquisitor" but then who really does...?)

So first up are the two figures you will only find in the Ron and Bones starter set, Melinette and El Antillano. All bases on the miniatures i created with simple basswood and Elmers glue.


One thing about these miniatures is that i didn't want to paint them at first. They have been sitting in my drawn since November. However, once i started painting these guys i had a TON of fun painting them. Particularly on these two i tried a variety of different techniques. I used a different skin tone composition than i usually do and i also used a new non metal metallic technique i learned ( i will put up a separate post on these techniques when i research them more and get some test pieces).  Sadly i could not get a good picture of El A's sword which is what i used the NMM technique on. Melinette actually comes with the Barrel.

Next up is Toruk-Te:

Toruk-Te here was a lot of fun to paint. He was the first one i used the new skin technique on. I also used another blending technique i only use when i try really hard, both techniques were taught to me by Brushmistress (once you see HER blog you might not come back here...). I wanted to do something unique with his shark so i painted it up to be a tiger shark. I'm decently pleased with the result. Toruk wears the shark because his tribe believes it makes them invisible and stealthy, you don't see the man, only the shark.

Finally we have my favorite one, Erika Crabby.


Talk about a dynamic miniature. She was amazingly fun to paint and had so much going on she really defied pictures. Shes one of those miniatures you don't appreciate until you see it in person. Erica is put on board a ship and comes with a cache of hand trained ninja crabs, which, in my opinion, is pretty frickin' cool.


Tales of war Miniatures: my impressions. 

These guys make some solid miniatures. They pic a theme and they do it up. Best pirates for your buck, you can find any type you want and quite frankly i want a few more... They are great fun to paint and go well with relatively simple bases since each one has so much going on.

There are a few drawbacks to how these guys do things. The first and most aparent to me came while cleaning the models. The mold lines are NOT in good places. Erika had one across her face, Melinette had a few across her hair ( a personal bane ), they just seem to pop out at you when you don't want them too. Also since the miniatures are so dynamic, there are a lot of fiddly pieces. Stuff that is hard to glue together and stuff that will easily break. You can't really pin it either since the joints are so small. Finally these guys are based overseas. Thus the miniature prices are a little high and its tough to get em.

Problems aside you definitely get bang for your buck with these guys. Good solid dynamic sculpts that make you remember why you started painting. I definitely recommend this line.

Coincidentally my benefactor seems to have accidentally ordered two of everything i have painted (starter set plus Erika and Toruk), so if anyone has any Relic Knight stuff i would be more than happy to do some trading (I really want to paint some of those guys from Soda Pop Miniatures).

A plan of future of reviews:
So a week from Sunday i hope to review the Ron and Bones game proper. And within the next few months i will review a new game that is being released by a personal friend of mine will be reviewed: Pocket Kung Fu (I am this games biggest fan-boy so be excited about this!).

Peace out till next time,
Steve (MDX)