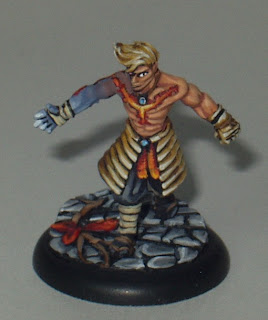
This week i will be taking you through a tutorial that requires much less skill and a little more precision. The tutorial this week is for a railroad base as seen below on the wonderful Malifaux model Perdita.
What you need for this project is as follows: Baswood (or balsa), superglue (like you don't have this if your a gamer), your trusty nickle, a small ruler (not pictured), a 35mm base, an exacto, and flock ( preferably a mix of regular flock and sand flock). You will also need a very small amount of green stuff but it is not necessary.
So the first thing we need to do is fill in the slotta in this slotta base. Since i have started doing some cool custom bases the slotta has become a natural enemy. It is unneeded when you need to place the figure on top of a created surface. So to do this we will cut 2 small strips of bass wood that are about 6/8ths of an inch long and then glue them together. This will fit nicely inside the slotta. make sure you smooth out the surfaces of your filler peice. Glue it into the slotta making sure the surface is smooth.
Now that we have delt with the evil slotta we can get to the base itself. For this base it is best not to put plasticard over the surface of the base. You want your base creation to exist underneath the lip of the base. This will give it a better realism.
The first thing we will do is create the main rail you do this just like you created the slotta base filler piece. you will pick an angle on the base and measure it out using the nickle (the slotta is inconvenient to measure on because of the lip) cut out two strips that are your desired lengh and a little less than 1/8th of an inch thick.
Glue them together and you have your main rail. Glue the rail to the desired section of your base.
Now we will start to work on the rail cross beams. For this cut out about 5 strips that as long as the diameter of your base. You probably won't need as many as this but its nice to have enough. These should be a little thinner than your main rail.
Next we make the small outcropping of the cross rails as seen above. Just cut a small piece from your scraps of cross rails, they should be about 1/8th of an inch long or so and be as thick as the rail they are to compliment. Glue them in place so they look like continuations of your cross rails. These are a little tough to manipulate. I usually stick them on a pin and use the pin to manipulate them into place.
There, now we have our basic railway. you can stop now if you really want, but in my opinion it needs too look a little more rugged and natural. So now we add some flock. To do this grab a brush you don't need and smear a good amount of Elmer's Glue next to the rails.
The green spots pictured above are just smooshed green stuff balls that are there to simulate rail spikes. These are not necessary but do add something to the piece. However, they are a little tricky to get into place. To get them where i want them I put glue on the crossbeam continuations and manipulate the green stuff with a pin. If you create them make sure you don't make them too big.
Next we pour flock over the glue. Blow off the excess and clean up the rails. There will be flock on the rails so take a sculpting tool and just clean things up and push some of the flock down below the rails. You will know what looks right when you do ( ya that's helpful right?)
Now we prime and presto! railway base all ready for painting.Sorry the final product is hard to see. i didn't have time to paint it up. I didn't even have time to paint a figure for it. Geeze I'm lazy.
Next week:
I will be taking a week off next week though i may update during the week. I plan on getting some games of Anima tactics in the week after and then i have Pax East! Woot, it should be fun. So unless i get some suggestions for tutorials of reviews the next three weeks will be week off, Pax stuff, Anima. That's a whole other month! Wow time floats on its little wings right by me.
Bonus stuff!!
Being relatively un-gifted at the sciences and currently taking lots of science courses, I constantly find new ways to try to distract myself ( subconsciously of course). I found this supremely awesome role playing game for the I phone/pad and have been playing it way too much. I mean when my party includes the Black Knight, and a Pirate!? Yes, very yes.
So go check out Battleheart. It is well worth the three dollars i spent on it.
Till next time, game with your soul and not with the power.
peace,
Steve (AntiZombie)


No comments:
Post a Comment